Can you use WordPress to create a FULLY customized website?
Yes, you can!
Recently, for the first time, I created a custom website with a WordPress theme from ThemeForest.
One that I am quite proud of.
When I start building a website, I often choose a theme together with my client that appeals to us.
Then I start working, make adjustments to the theme, add the desired layout, logo, font, house style colors and content.
With a theme from ThemeForest, you come a long way to meet all the wishes of your client (or yourself…).
But there are always things you can’t change. Because the purchased theme is the starting point and you can’t deviate too much from that.
Until recently, you had to hire a real developer for a customized website. After all, they know about PHP and CSS codes and build the website from scratch.
But especially in the last two years, this has changed and you can create a custom website with a purchased theme.
This is made possible by so-called multifunctional themes. These themes are very flexible and offer so many possibilities that you can customize the website up to 95 to 100 percent.
All-rounder BeTheme
There are only a few themes that meet these requirements. Avada, the most popular theme of ThemeForest, is an example of this. This one has an incredible number of theme options, which you can use to customize your website.
Recently I have discovered a new theme, an all-rounder.
BeTheme is in the top row of best-selling themes. You can choose from 230+ demos, which you can install with 1 click.
But BeTheme is also enormously flexible and versatile. This is because of the many possibilities the theme offers.

One of my clients, Pieter of Jolly Photobooth, wanted to have a custom website made. Jolly Photobooth is at events with a photo booth, where guests can have funny photos taken of themselves.
Can you also use WordPress to create a custom website, Pieter asked.
He had a very outdated Wix.com website, which had to be renewed urgently.
He had already made his own design of the new website in the software program Photoshop.
That was exactly what the new website had to look like. Is that possible?
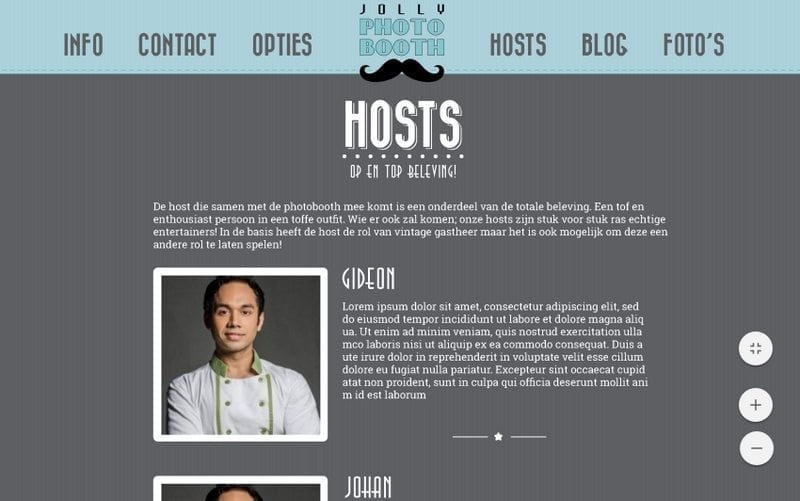
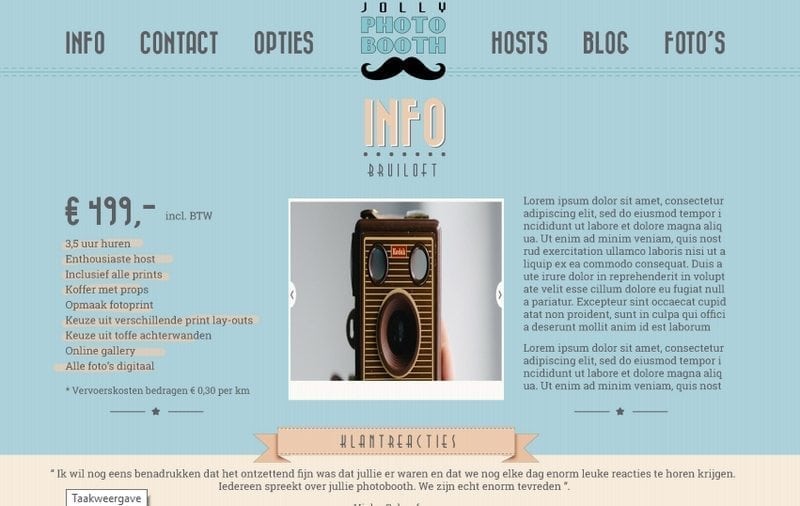
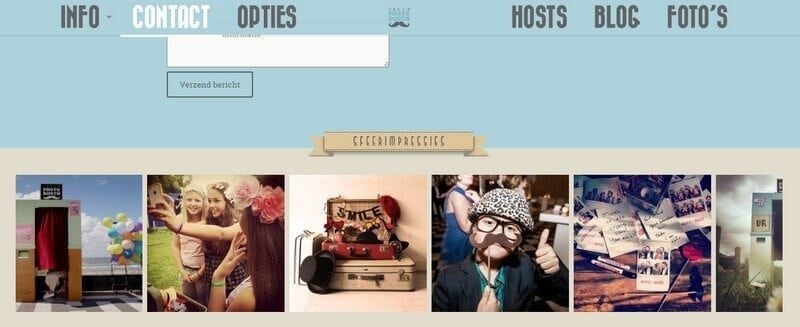
Here you can see two examples of the design of the new website of Jolly Photobooth. With a lot of attention to detail, and with a vintage look.
Creating a custom website with WordPress; that was a challenge for me.
What is it all about? What should you take into account if you want to build a custom WordPress website?
Well… I’ll give you a look in the kitchen with some tips.
Hold on tight, here we go…
Step 1: Choose a suitable theme
I already had experience with Avada, but I had also read good reviews of BeTheme and decided to work with it. It was a bet because I didn’t know yet what the possibilities were.
But soon I noticed that it was a shot in the bull’s eye. BeTheme, for example, has two-page builders: the WP Bakery builder and its own built Muffin builder.
I knew the visual composer, but I didn’t know about the Muffin builder. Initially, I wanted to use both page builders (that’s possible!). You can then create one page with WP Bakery builder, the other page with Muffin builder.
But after a few weeks, I found out that it’s still better to pick a one-page builder. That is better for clarity.
I opted for Muffin. Although I am a lover of the WP Bakery builder, the Muffin builder turned out to be just a little more suitable and extensive.
Step 2, Choosing a prebuilt demo
You can build a website from scratch, but you can also install a so-called prebuilt demo. Many themes now have this possibility; you can install a ready-made website, which has already been designed by the theme builders. Often with just a few clicks, you can install such a complete website.
BeTheme has more than 360 of these demos.
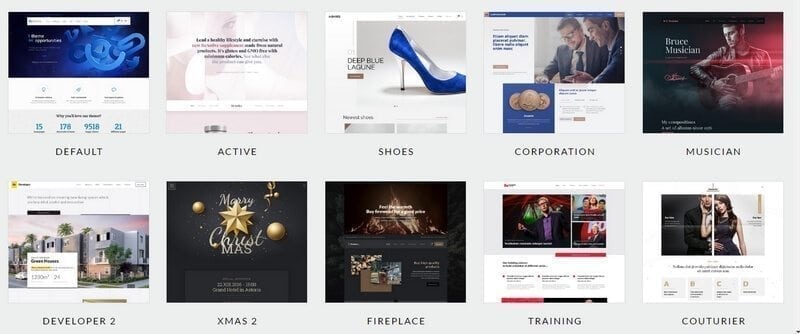
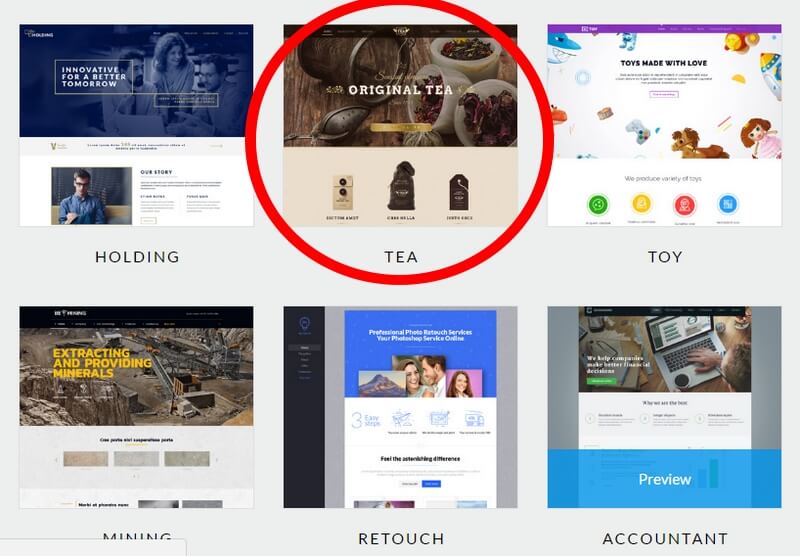
These are eight of the 360 (!) themes you can choose from. A few clicks and you have installed an exact copy of the website.
So an incredible amount.
What should you pay attention to? I mainly looked at the header/navigation structure of the theme. With Jolly Photobooth, the logo had to be in the middle.
The navigation/header is an important part of the website, which you can often modify to a limited extent. So I chose a header that came closest to the desired sketch, the tea theme.
Because BeTheme has so many demos, there’s always one that gets close to the design you want.
Step 3 – Customization
Once you’ve done the two previous steps, you can start customizing the theme, customization.
In BeTheme you will notice that there are a lot of settings.
Like the other popular themes of ThemeForest, BeTheme works with a page builder.
This way you don’t have to work with codes, but you can click on an element (text block, photo, slider, button, etc.) and put it on the page you are building. You can also easily drag them back and forth from left to right or up or down.
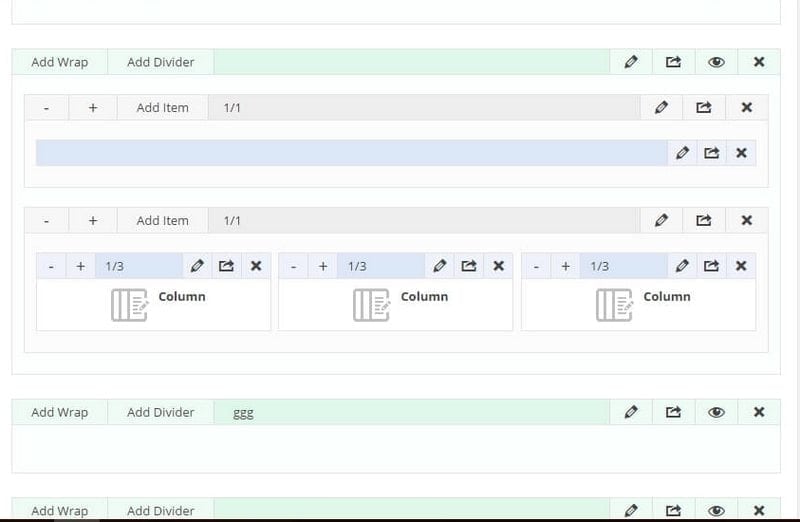
Here you can see an example of the page builder. It’s made up of blocks in which you can put elements. For example, I have put 3 text blocks (column) in it.
A tip: remember the start settings of the elements. If you do something that doesn’t work out well, you can switch back to the original settings.
BeTheme is so flexible because, for example, you can also move elements a little to the left or to the right (from or to the margin of the website). This is not possible with every theme.
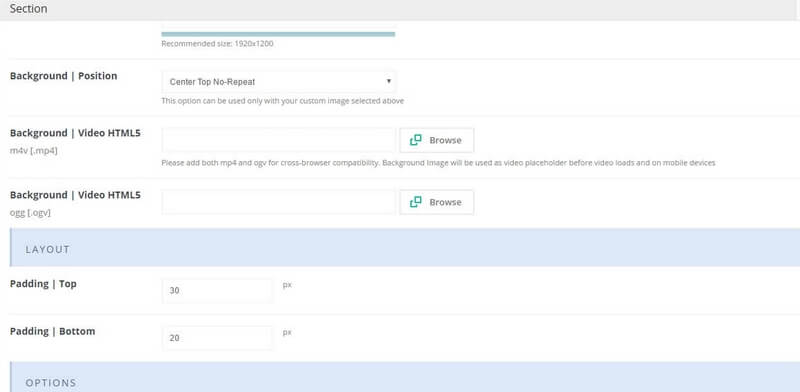
These are other settings where you can move a block up or down a bit (Padding Top / Bottom). This way you can get the elements exactly where you want them.
BeTheme has a lot of possibilities to customize the website. We give a small impression:
FONTS: The theme offers fonts from Google and you can choose from more than 600 different fonts.
But…
Jolly Photobooth wanted his own fonts and there is also a possibility for that. You will then have to place a number of files in the following input field:
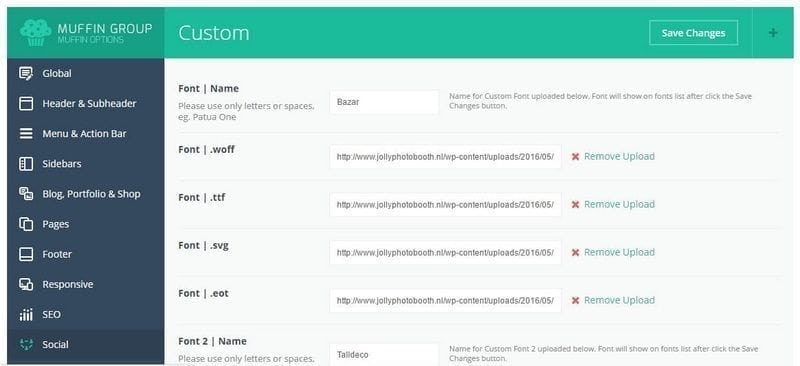
Here you can enter your own fonts, which for example you bought somewhere. You have to enter 4 extensions (.eot, .svg, etc). This ensures that the fonts in each browser are easy to read.
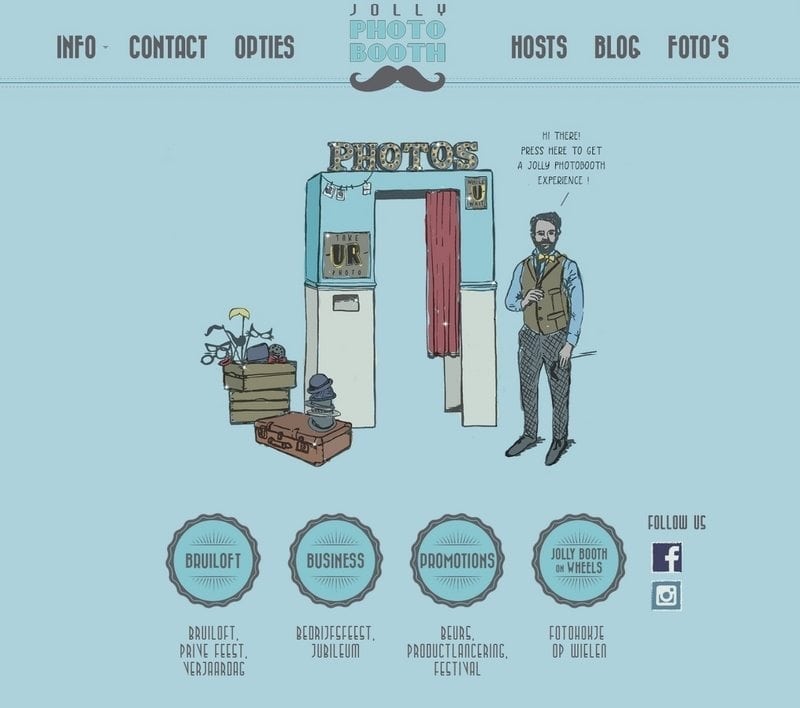
FRONT PAGE: Jollybooth wanted to design the front page entirely himself. With a drawing, own buttons, which had to be placed exactly in a certain place.
The solution was… the Revolution Slider.
This doesn’t just allow you to make sliders (those are the moving photos on a page). You can also insert all kinds of submitted elements and put them down almost anywhere.
Jollybooth had a drawing drawn (by Lizette) and designed the buttons for social media himself.
COLORS: The colors can also be determined by the user. With HEXA codes (they look like this: #34df33) you can get any color you want.
And this what the front page ended up like:
Step 4 – Create your own elements for the website
Jollybooth wanted its own designed elements (buttons, text, sliders, etc.) on the website.
That means that you have to make them yourself or have them designed by a designer.
If you want to do it yourself, you’ll come a long way with design programs like Paintnet or Photofiltre. The professional designers work with programs such as Photoshop, Indesign or Illustrator.
Jolly Photobooth provided all the elements himself. At the bottom of the page of Info Bruiloft, a transition had to be made from the blue to the beige field, containing a button ‘customer reactions’.
How did we do that?
First, you design an element:

Then you put this element in the page builder:

And then you see the result:
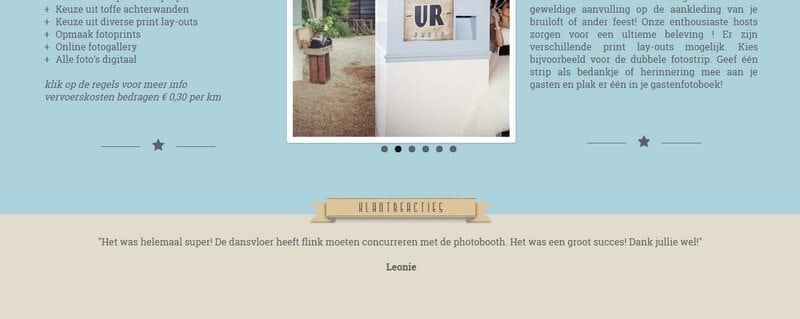
And so you can put all the elements into it, wherever you want.
Step 5 – Use additional plugins
It’s not always possible to customize a website with the existing functions.
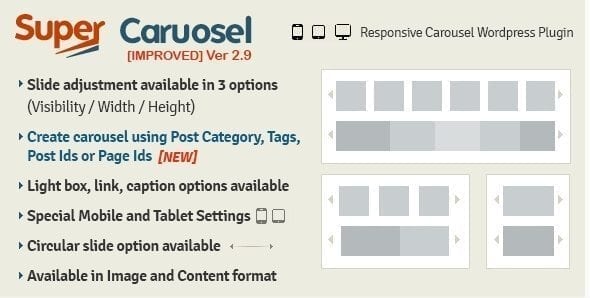
BeTheme, for example, has a carousel slider, but Jolly Photobooth wanted a slightly more extensive carousel slider.
You can solve that with an external plugin. I went looking for a carousel slider plugin that met all the needs. That’s how I ended up with the Super Carousel WordPress plugin.
This is a fairly extensive plugin with which you can make a custom-made carousel. The result was very satisfactory:
Step 6 – Make use of support
Popular themes that are bought frequently have a good support department. If you want to customize your things, you can get support.
BeTheme also has a good support department that can help you to customize the website.
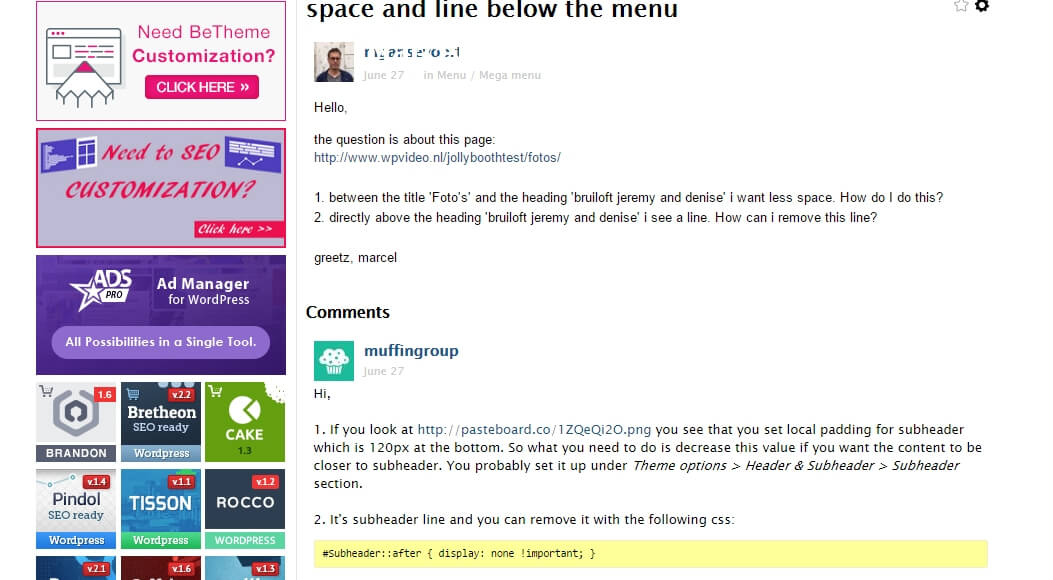
Here you see such a discussion between me and the BeTheme support team. They are very willing and help you as much as possible. And also send codes for specific adjustments to your website. I have made quite a lot of use of that. BeTheme really goes a step further than most support services.
Step 7 – Make the theme responsive
First I build the website on my laptop.
In principle, the theme is responsive on a computer, tablet or smartphone, but if you create a custom website, you may find that it is no longer fully responsive on one of the devices.
You can also solve that with the help of the support department.
Sometimes you have to make compromises because you don’t always get it perfectly on your computer, laptop, smartphone or tablet.
In addition, you also have to deal with the different browsers, such as Chrome, Microsoft, Safari. These are also important for responsiveness. And also the difference between older and newer versions…
But all right…
With Jolly Photobooth, for example, the button ambient impressions on the computer were large enough but too small on the smartphone. At that time we had to make the button a little bigger to make it easy to read on both devices.
The front page had to be adjusted on mobile as well. The Revolution Slider has an option for this. You can set up the slider separately for computer, tablet, and mobile, as shown:
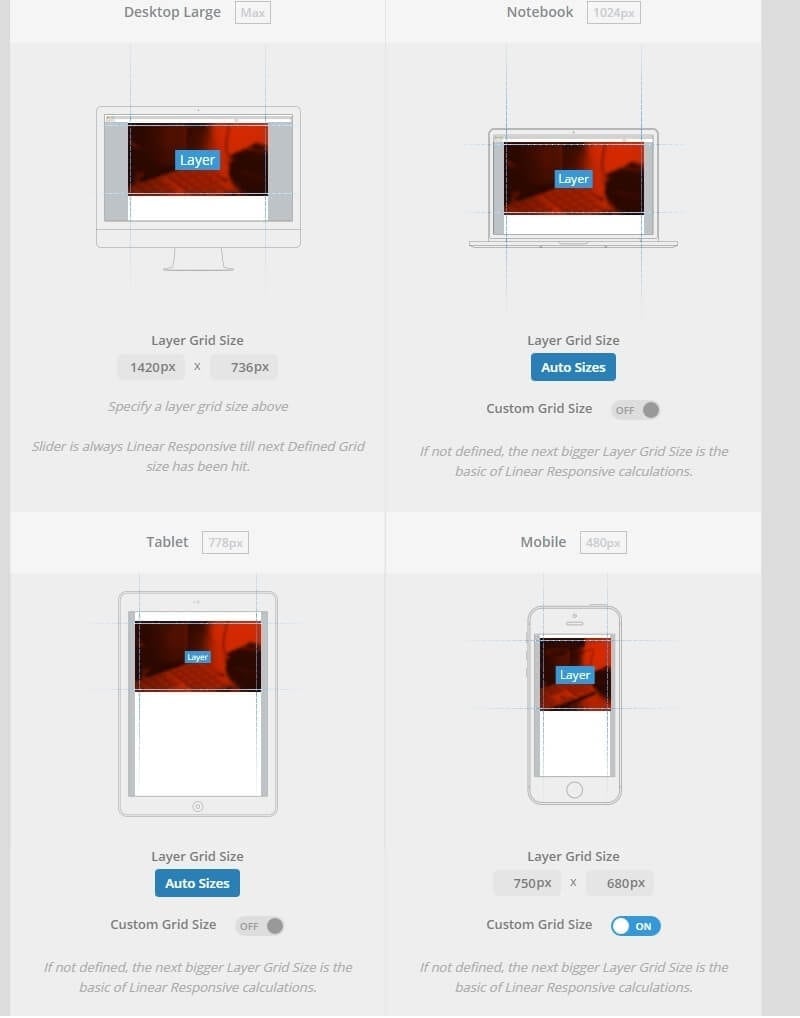
These are the settings of the Revolution Slider. As you can see, you can customize the different devices even more.
Conclusion
Creating a custom website with WordPress is becoming easier and easier.
Anyone can do it, you can do it too. You don’t have to be a developer for that.
But… it takes time and energy to master BeTheme. So you have to gain experience with this multi-faceted theme.
But if you invest in it, you’ll enjoy it incredibly and be able to build everything yourself.
If I have to create a custom website again, I will definitely use BeTheme from now on.
An all-rounder, that’s BeTheme!
Alright, have you become curious? This is the website van Jolly Photobooth.


