I have recently experienced the benefits of MailChimp automation.
It is a tried and tested way to build a relationship with your website customers or visitors.
I have created a 5 day e-course with MailChimp automation.
For five days, the person who has signed up, will receive an email at a certain time with tips about how to come up with blog topics for your website.
An online e-course really binds customers, often even more than for example offering an e-book.
You have contact with your customer and you can tell more about yourself. And this just might be the reason for customers to contact you about the services you offer.
The great thing is…
… it becomes easier over time to create an e-course for your website yourself.
You can do it too!
Because recently there was GREAT NEWS at MailChimp. This email marketing company announced that you no longer have to pay for one of their best functions, automation.
What is automation?
Automation (also referred to as marketing automation) is a series of emails, which you send automatically. You can send an email to a customer or visitor automatically, every day, once a week or once a month. On the basis of triggers (the time/date) you can set up which message you want to send.
You can send your customer or visitor:
- a thank you email after a purchase;
- another great offer after three days;
- a 5 day course;
- a birthday wish.
And there are many more options with the MailChimp automation tool.
It is a great function which will now be available for free!
Now a lot of businesses still use paid service like Autoresponder, a similar system.
There is no catch with MailChimp
Is there a catch with the free MailChimp offer? No! The only thing you need to pay for is the support. This is their source of income.
But you can come a long way without this support.
I have done it too!
We will explain in this article how to offer a multiple day course. With an email containing one tip, sent every day.
I am going to explain it as specific as possible, with a lot of images.
Are you ready? This is really worth it!
Obviously you first need to develop a course. I am not going to go into this, because I am focused on the practical and technical part of creating an e-course.
But it would be useful to first create a course, which you can spread out over several days.
First you need to, if you haven’t yet, sign up with MailChimp.
Once you have done this and you login afterwards, you will see the following screen:
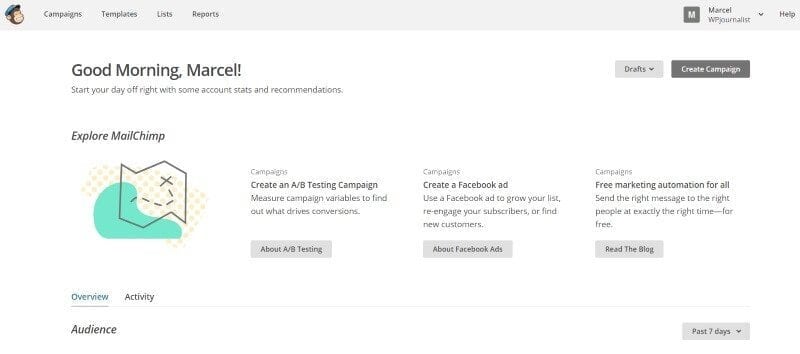
First you need to create a list. At the top of the navigation you click on ‘list’.

Then click on ‘create list’. You will now receive a notification if you want a ‘new list’ or ‘group’, but then click on ‘create list’ again and you will see the following screen:
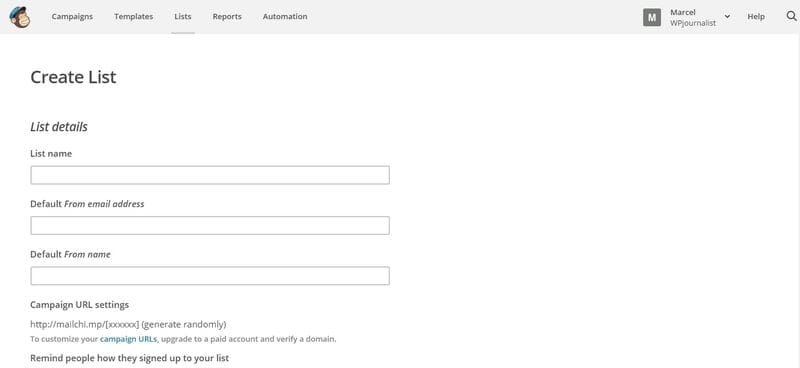
Fill out the open input fields. It all speaks for itself.
Once you have done this you will receive the following notification: Excellent! You have a brand new list.
The list has now been created and you move on to the next step.
Mailchimp automation
You look into the dashboard and to the right you will see the button ‘create campaign’, click on it.
The following page appears:
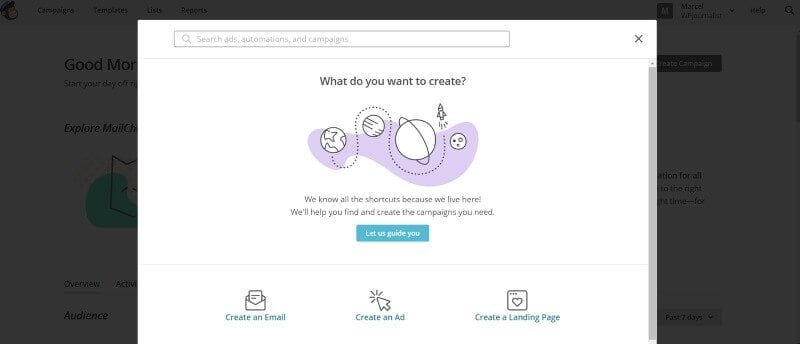
Take a look around because there are several options.
We are going to create a 5 day educational course. Click on ‘Create an Email’ and then click ‘Automated’.
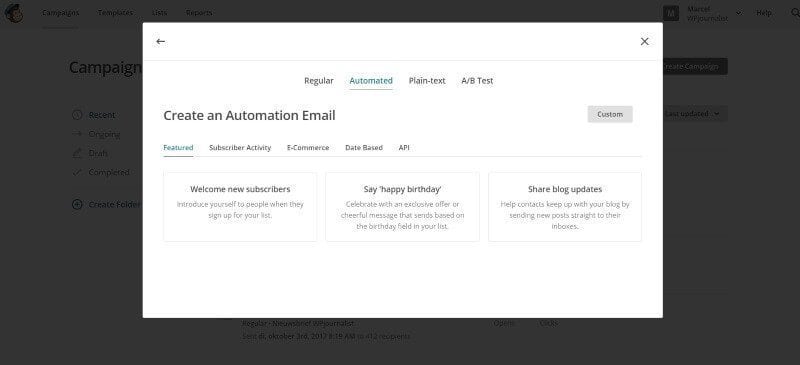
Then click on ‘Welcome new subscribers’ and then on ‘Education services’ (at the top):
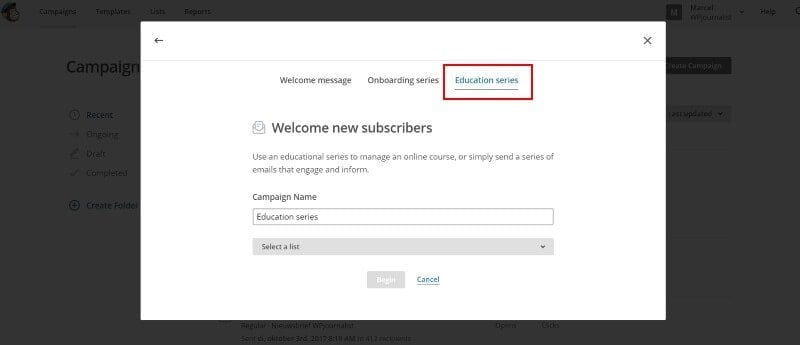
Then select the course you have made in the ‘Select a list’, in our case ‘create short course subjects for your blog’ and then click on the button ‘Begin’.
And then you can start entering the course.
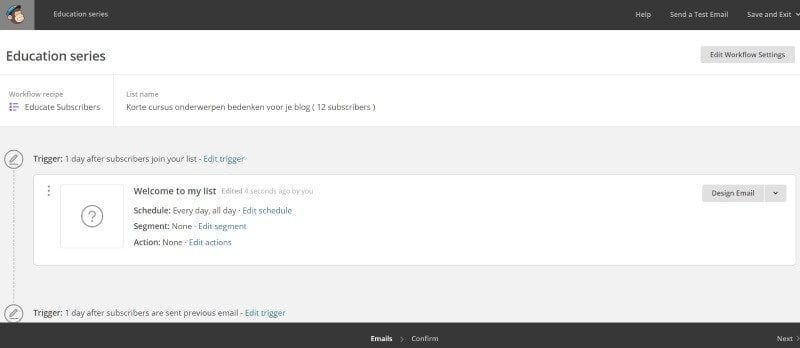
You can see they start with an introduction of the course. And there are 4 lessons, which you can expand with more lessons (with ‘add email’).
Let’s start with the introduction. Don’t forget to set up the trigger (found at the top of the lesson) first.
I would set it on immediately, so the person will receive the course introduction immediately after signing up for the course.
Then you go to ‘design email’ (right) and you can fill out the introduction. First you arrive on a page where you for example need to fill out your ‘email subject’.
This is the line people see in their mailbox. So important! This needs to stimulate, so people will click through to the message.
Way down to the right you will see a button with ‘next’ which you need to click on.
Here you click on a template, a layout of the course.
Then you will see the following screen:
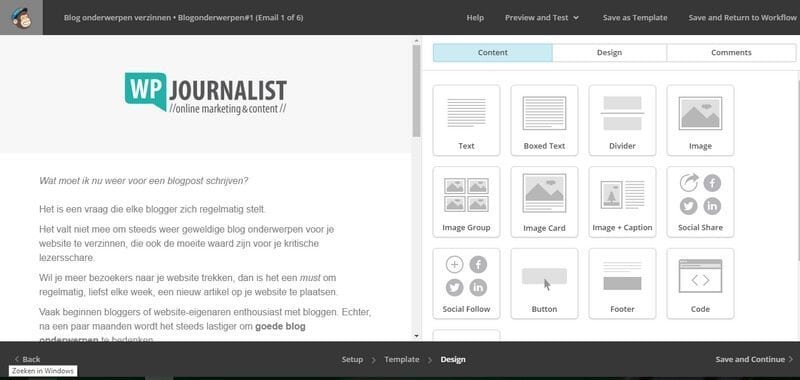
On the right side you can drag the blocks you need to the left side. And then you can add text. It requires some practice, but it is quite self-explanatory.
When you are finished and you have added all of the text and images, you click on ‘save and continue’ at the bottom. Now you are back in the course overview.
And this way you create all of the lessons.
Green checks
With my 5 day e-course, I have set the trigger for the introduction on immediately, and I have set every lesson on ‘wait 1 day(s)’. This way you send a part of the course every day.
If you are completely finished then click on ‘next’ at the bottom right.
You will then see an overview of your workflow setting and you can see if everything is set up the right way. Green check means good, a red check needs some more looking into.
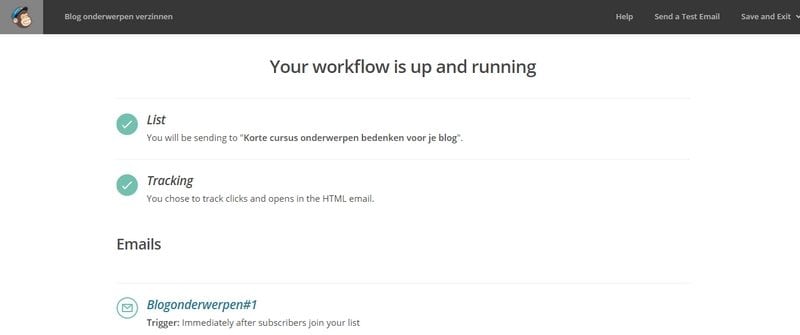
Great!
If you go back to ‘automation’ through the navigation you will see that the e-course has been added.
You are now finished in MailChimp!
There are quite a few steps, but once you know which steps to take it is not that hard.
Linking MailChimp
We are now going to the next step: linking MailChimp to your website.
In other words: people need to be lead to your 5 day course through your website.
Step 1: design an image where you indicate that visitors can take part in your course.
I myself have created an image with Canva. With Canva you can easily, even if you are not a designer, create your own designs. Really a great program! And for free.
Really think about the text and headers you use. It needs to stimulate, so they click through.
Step 2: upload this image to your website. Then you paste the image code into your sidebar at: Display > widgets.
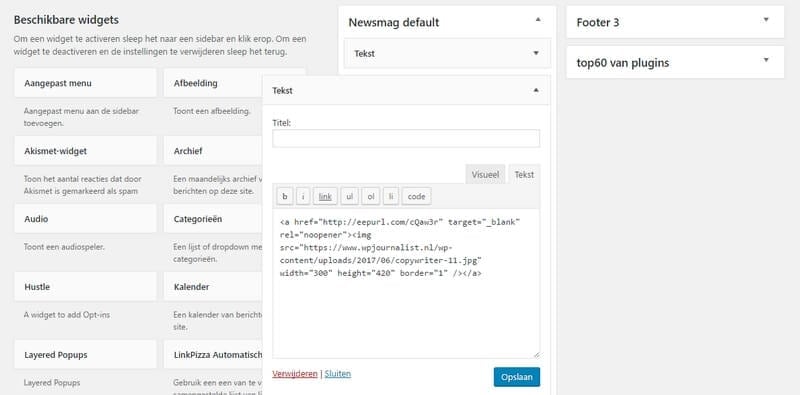
This is what the code looks like:
<a href=”http://eepurl.com/cQaw3r” target=”_blank”><img src=”https://wpjournalist.nl/wp-content/uploads/2017/06/copywriter-11.jpg” /></a>
The blue parts need to be edited:
https://wpjournalist.nl/wp-content/uploads/2017/06/copywriter-11.jpg should be replaced by your own image code.
http://eepurl.com/cQaw3r iis the code you find in MailChimp. First you click on ‘lists’ in the navigation, then you go to the concerning course and you click on it.
Go to ‘signup forms’. Then to ‘general forms’. And then a little below you see the ‘signup form url’. You replace this http://eepurl.com/cQaw3r with the new url.
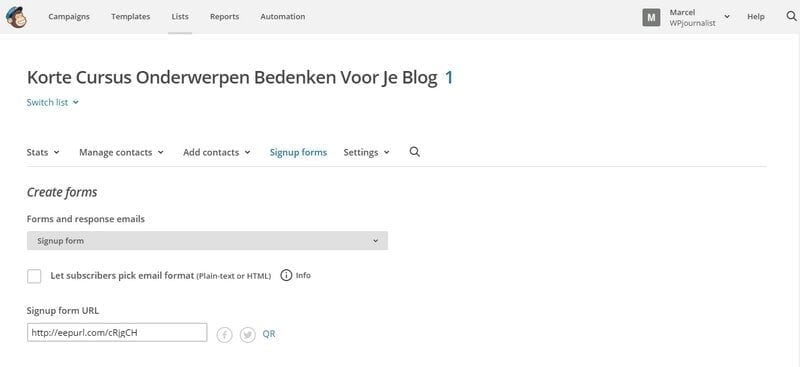
Scroll down a little and with ‘built it’ you can change and edit the text.
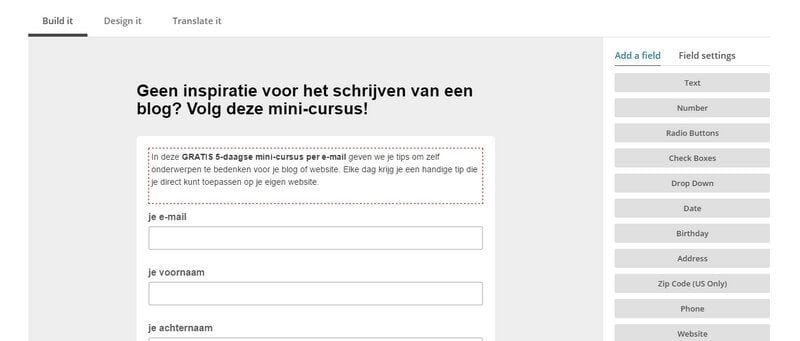
Now the image is linked with MailChimp! Reload the page and you will see the image has appeared on your website.
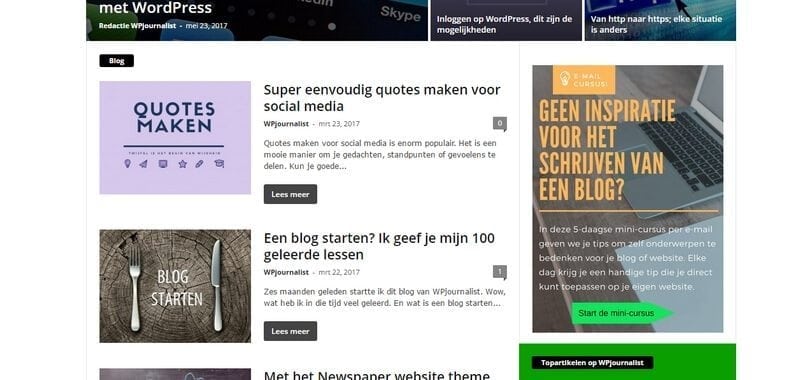
If you click through, you will see the sign up form where visitors can sign up for the course.
And done…

You now have a fully-fledged 5 day e-course, with which you can make your readers very happy!
Conclusion
It is almost unbelievable that these kinds of services are offered for free.
Email marketing, as it is called, is still at the beginning of a bright future.
Offering an ebook has seen its best times, it is much more fun and effective to offer an e-course.
A 5 day or a 20 week course, it is all possible.
Often the e-courses are still quite basic and simple, but with the free MailChimp function, it has become very accessible to develop adult courses yourself.
An e-course about a coaching trajectory, yoga lessons or collecting stamps; it can all be sent automated.
Obviously, it requires some investment time wise, to learn to understand the MailChimp automation function.
And you need to develop a course yourself.
But when you link the two above mentioned things, you will have unlimited options to gain more customers or visitors.


